The Local Security Authority Protection (LSA) ensures that only authenticated users can log in to the local computer. It prevents the login from attackers and saves your computer from malicious login.
✓ It is mandatory to keep this setting enabled.
Due to some unknown reason, Local Security Authority Protection turns off and when you try to enable this setting, it asks for Restart. After the restart, when you check for this setting again, you see that this setting is still disabled.
No matter how hard you try, you will get the following condition each time.
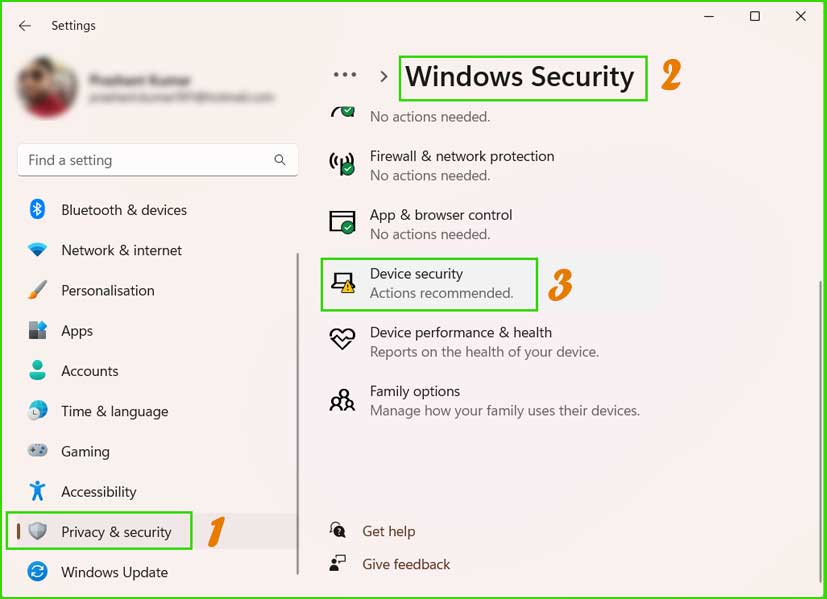
How to Turn on Local Security Authority Protection on Windows 11 & Windows 10?
Here, in this article, I am going to discuss some useful ways to turn on Local Security Authority Protection on your Windows-based computer.
Method 1: Fix using the Outbyte PC Repair Tool
There might be some system misconfiguration issues like corrupted system files, bugs in registry files, outdated drivers, crashed software, etc; which are causing the problems and not allowing you to turn on Local Security Authority Protection.
Outbyte PC Repair Tool scans PC for troubles, repairs them, and gives you an error-free PC environment to work.
dll files, exe files, sys files, various types of services, databases, etc so, it is not possible to keep monitoring all the files always. A brilliant PC Optimizer tool repairs damages, fix errors, update windows and drivers, and eliminate various types of errors silently. Outbyte PC Repair Tool does all the above task easily and provides you an errorfree and smooth Windows environment to work so that you can focus on your business only.
Step 2. SCAN your Windows PC
Step 3. Click Fix button to Repair Error
Method 2: Fix using Windows Update
It is like a security bug in Windows computers. Wait for the hotfixes that may come with the next Windows update. Keep downloading and installing the latest Windows updates to fix this problem. Also, update outdated drivers and apps.
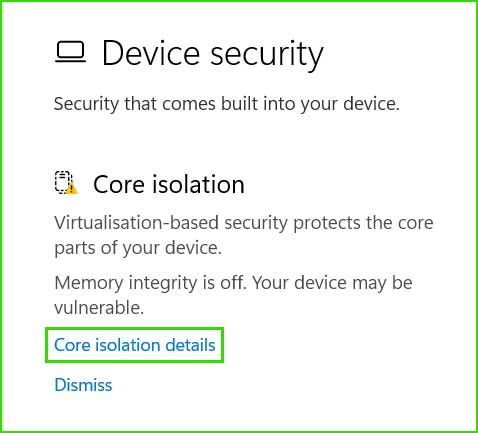
Method 3: Turn on Local Security Authority Protection in Core Isolation setting.
Let’s try to turn on this setting using the Core Isolation window.

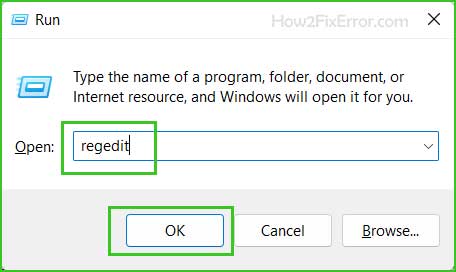
Method 4: Fix using Registry File
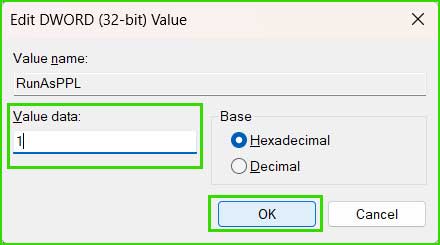
If the Local Security Authority Protection is turned off, you can enable it via the Registry file. It is recommended to make a backup of the registry editor and keep it an the external device before editing.
Computer\HKEY_LOCAL_MACHINE\SYSTEM\CurrentControlSet\Control\Lsa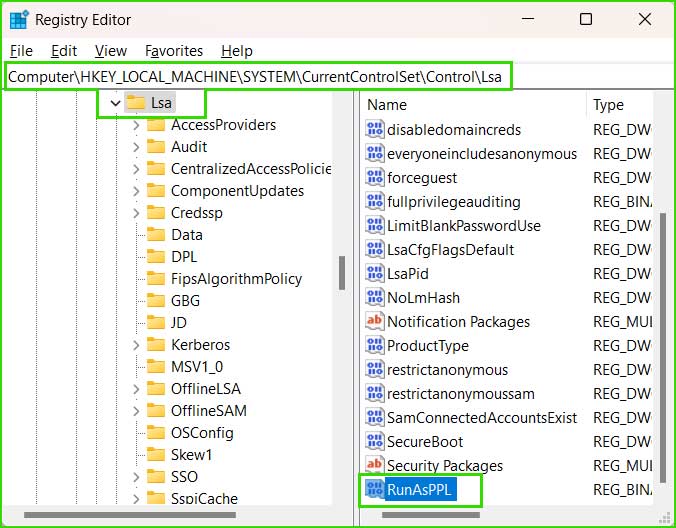
Method 5: Fix using the PowerShell
Run the following command in Windows PowerShell to turn on the Local Security Authority Protection on Windows 8/10/11.
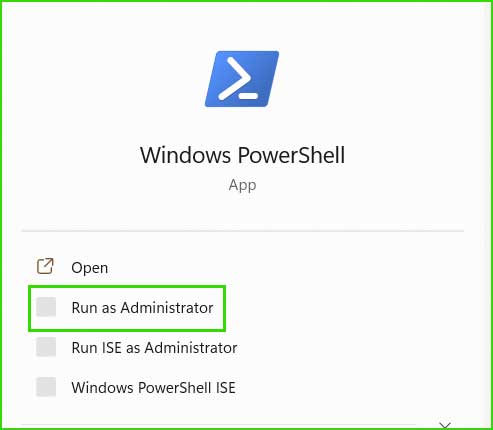
reg add HKLM\SYSTEM\CurrentControlSet\Control\Lsa /v RunAsPPL /t REG_DWORD /d 2 /f

reg add HKLM\SYSTEM\CurrentControlSet\Control\Lsa /v RunAsPPLBoot /t REG_DWORD /d 2 /fMethod 6: Repair your computer using SFC.exe, DISM, and CHKDSK commands.
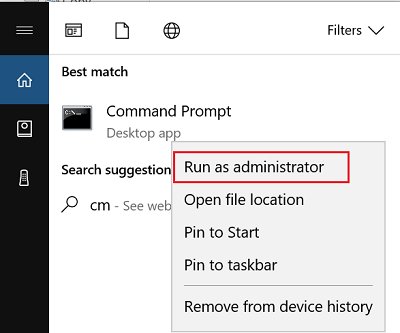
sfc /scannow
Dism /Online /Cleanup-Image /CheckHealth

Dism /Online /Cleanup-Image /ScanHealth

Dism /Online /Cleanup-Image /RestoreHealth
chkdsk /f c:
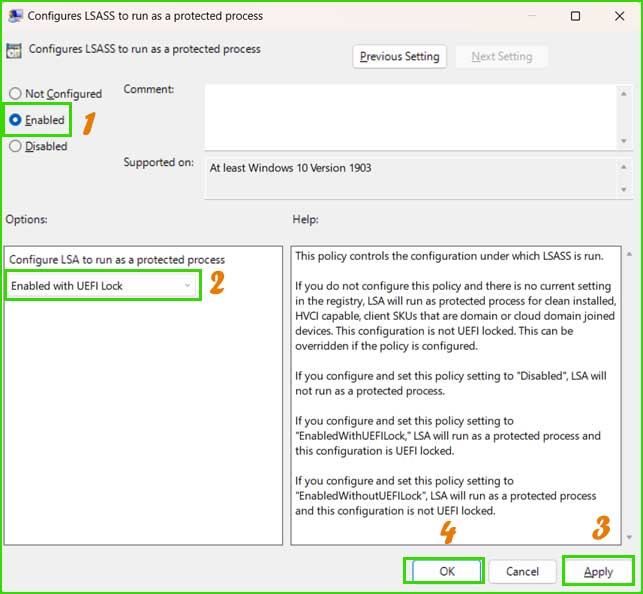
Method 7: Enable it via editing the Group Policy
You also need to enable the “Configures LSASS to run as a protected process” in the Group Policy editor.
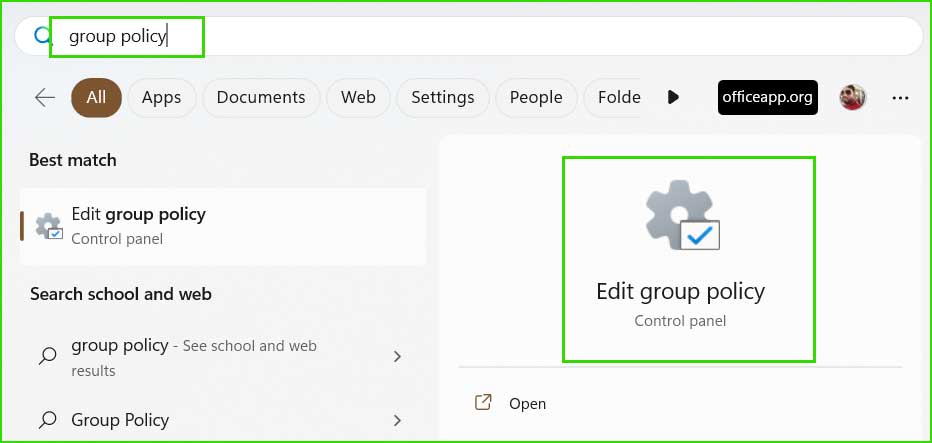
Local Computer Policy ➜ Computer Configuration ➜ Administrative Templates ➜ System ➜ Local Security Authority.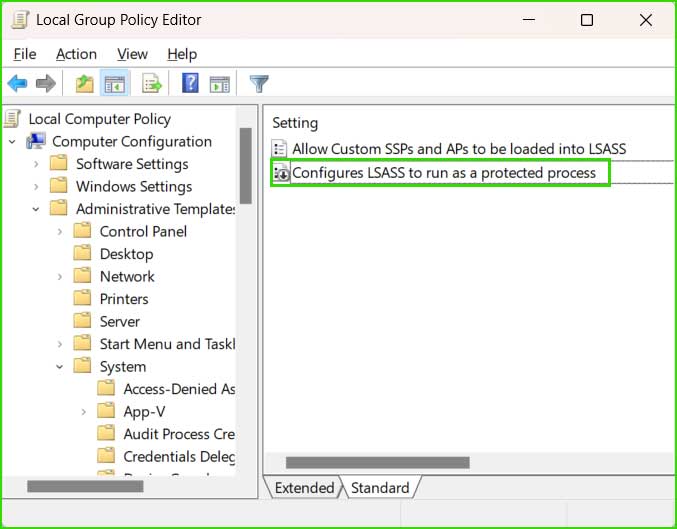
Summary
You may find the Local Security Authority Protection setting turned off for no reason. There are some solutions written in this article that will help you in fixing of Local Security Authority Protection Not Registering error.