Sometimes, when you try to install Windows updates through the Update & Security page, you may encounter the Windows Update Error 0x80244022. In this article, we will explain, why this problem occurs and how you can fix it efficiently.
It is necessary to keep your Windows OS updated in order to maintain security, scalability, and adding new functionality. Microsoft continuously release security updates, cumulative updates, features updates, and patches that helps Windows users to be secure and works smoothly.
The error 0x80244022 indicates that there is a problem with connecting to Microsoft update server.
The Windows update error 0x80244022 can occur due to one of the following reasons:
- The error 0x80244022 mostly occurs due to internet connection issue, incorrect proxy settings, or due to VPN connection.
- Windows Update Service might be not working correctly.
- Corruption in Windows update folder.
- Corrupted or missing system files.
- Disk error on HDD/SSD.
- Incorrect Date & Time setting
Fixing the Windows update error 0x80244022 is not a complex job, and any one can fix it by themselves. Just go through the following steps and resolve this error yourself.
Method 1: Fix using the PC Repair Tool.
Many times, it has been observed that the Windows update failed issue occurs due to corrupted or missing system files, bad registry entries, outdated drivers, problems in the Windows update folder, or the presence of malware or trojans on your PC. It is advisable to use a reliable PC optimizer tool to maintain the good health of your Windows operating system.
dll files, exe files, sys files, various types of services, databases, etc so, it is not possible to keep monitoring all the files always. A brilliant PC Optimizer tool repairs damages, fix errors, update windows and drivers, and eliminate various types of errors silently. Outbyte PC Repair Tool does all the above task easily and provides you an errorfree and smooth Windows environment to work so that you can focus on your business only.
Step 2. SCAN your Windows PC
Step 3. Click Fix button to Repair Error
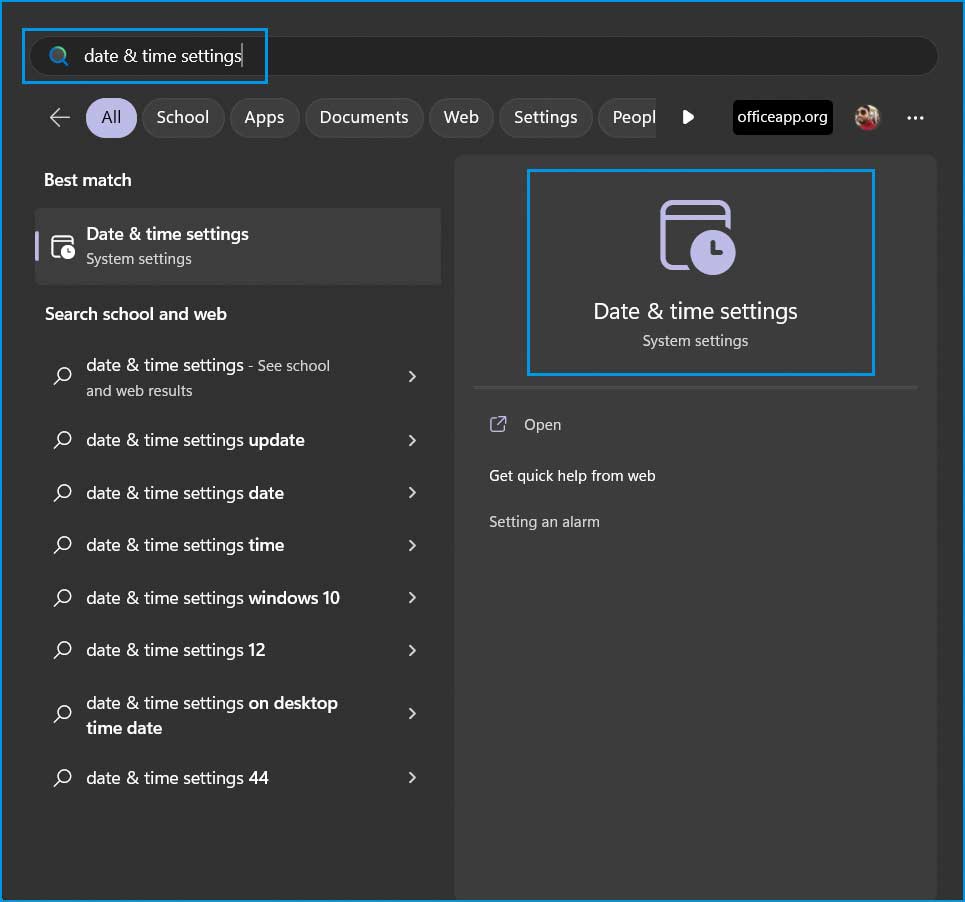
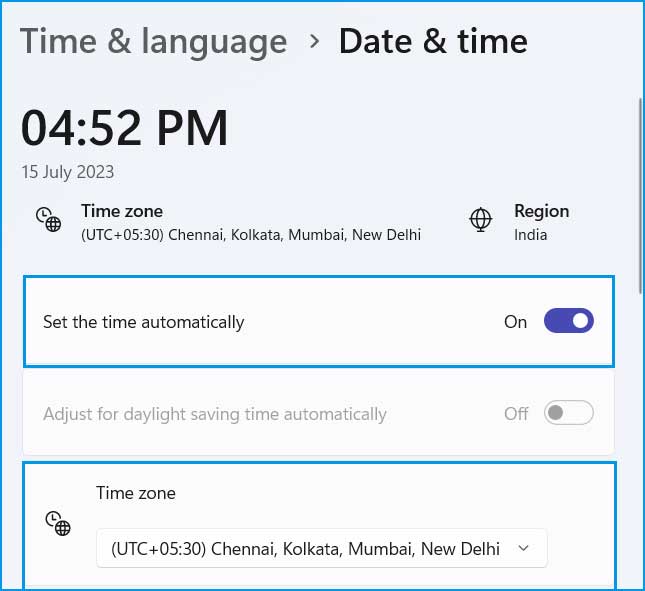
Method 2: Check for Date & Time Settings.
If your PC has incorrect Date & Time settings, you may encounter countless error messages on your Windows PC. Just check for date & time setting, and if you found it incorrect, make it correct.
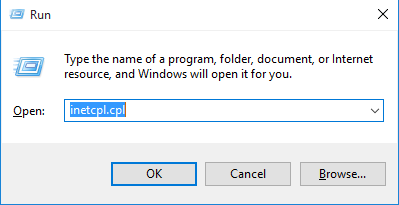
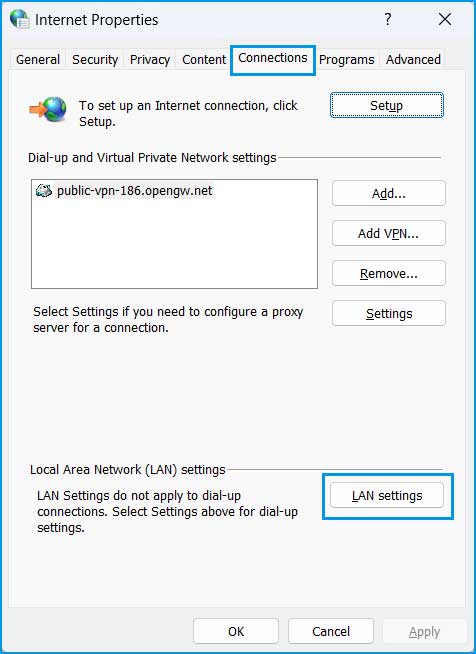
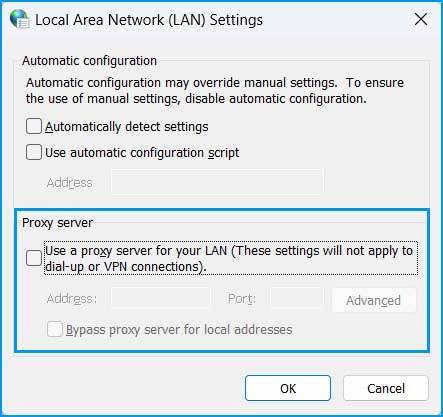
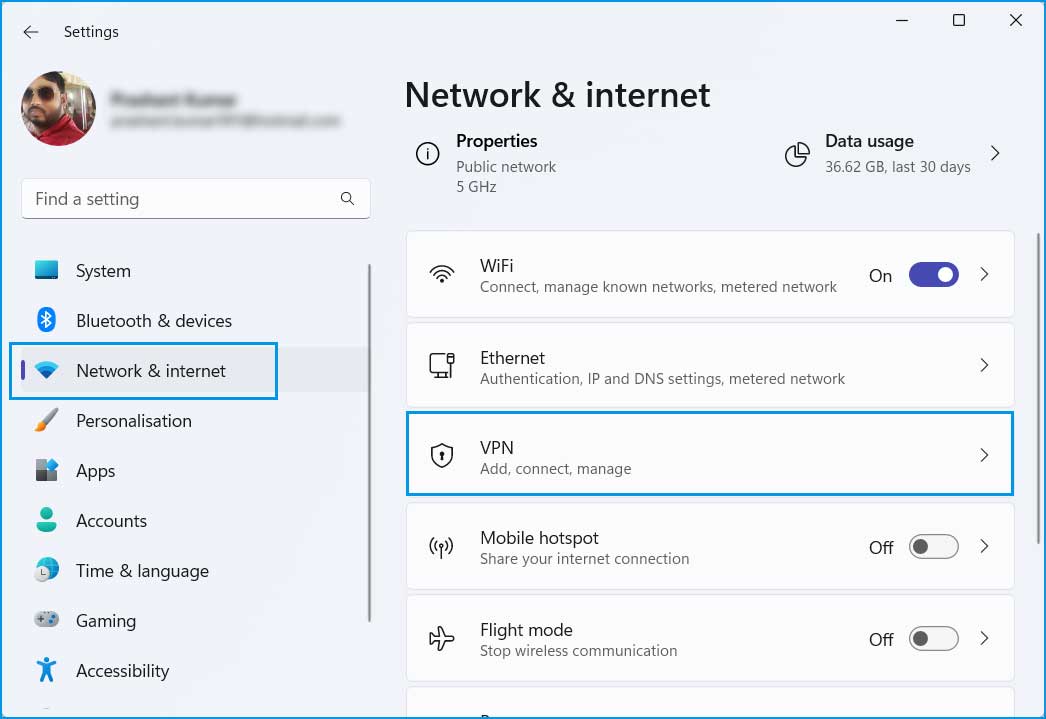
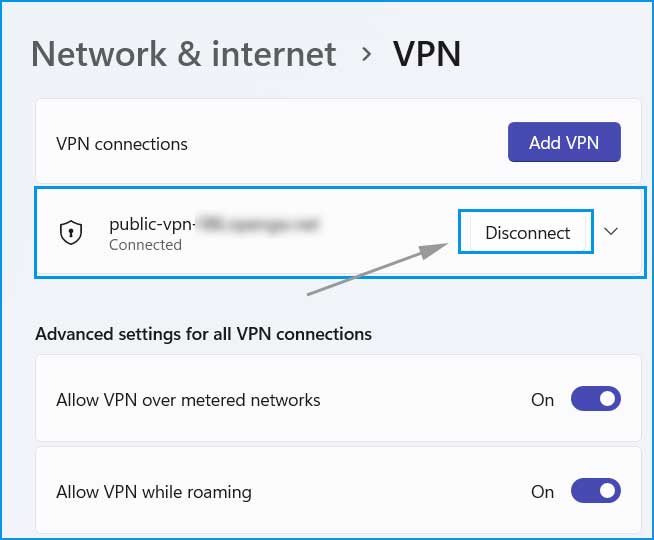
Method 3: Verify Internet connection, Proxy settings, and VPN connection.
One common cause of this error is a poor or unstable internet connection. If your internet connection is intermittent or experiencing high latency, it can disrupt the communication between your computer and the Windows Update servers, triggering error 0x80244022.
If your computer is configured to use a proxy server for internet access, incorrect or misconfigured proxy settings can interfere with the Windows Update process, leading to the error code.
If you are behind the VPN network, turn off VPN for a while and start installing the Windows update again.
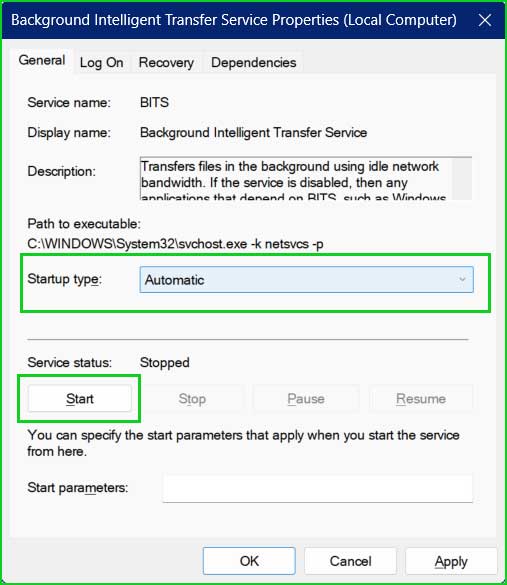
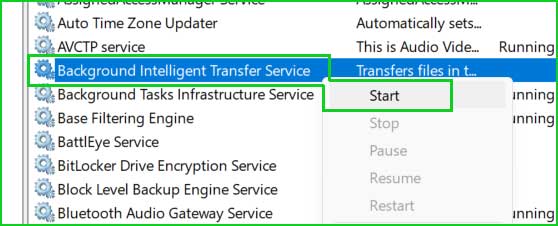
Method 4: Restart Windows Update Service.
Sometimes, restarting the Windows Update services can resolve update-related errors. Here’s how to do it:
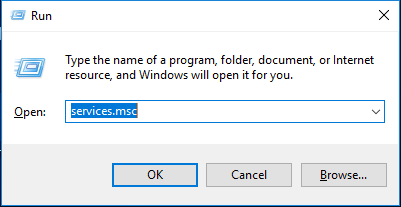
Background Intelligent Transfer Service (BITS), Cryptographic Services, and Windows Update.Right-click on each service, select Properties, and ensure that their Startup Type is set to Automatic.
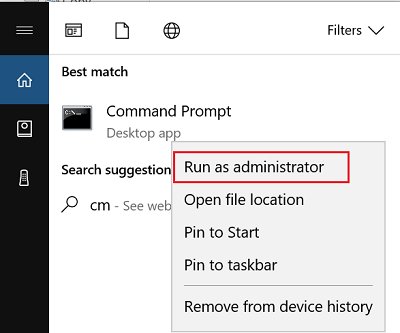
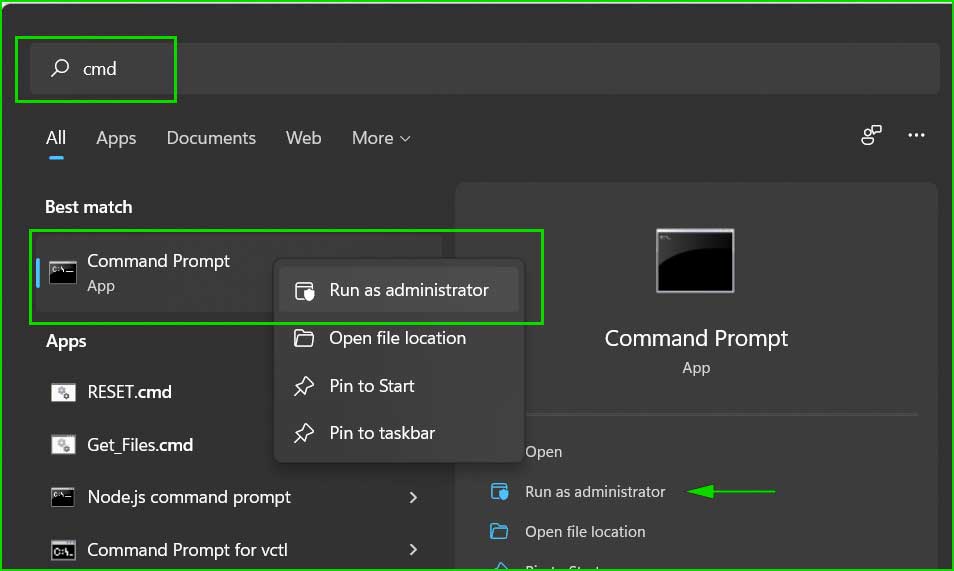
Method 5: Reset Windows update components.
Corrupted files in the Windows Update cache can cause update errors. Resetting Windows update components might resolve the issue. Follow these steps:
net stop wuauserv

net stop cryptSvc

net stop bits

net stop msiserver

ren C:\Windows\SoftwareDistribution SoftwareDistribution.old

ren C:\Windows\System32\catroot2 catroot2.old

net start wuauserv

net start cryptSvc

net start bits

net start msiserverAfter the restart, try updating Windows again.
Method 6: Run SFC, DISM, and CHKDSK tool to repair corrupted system files.
SFC (System File Checker), DISM (Deployment Image Servicing and Management), and CHKDSK (Check Disk) are all built-in Windows utilities that can help repair issues related to the file system. Each tool serves a specific purpose in diagnosing and fixing file system problems.
sfc /scannow
Dism /Online /Cleanup-Image /CheckHealth

Dism /Online /Cleanup-Image /ScanHealth

Dism /Online /Cleanup-Image /RestoreHealth
chkdsk C: /f /x /r
Method 7: Run Windows Update Troubleshooter.
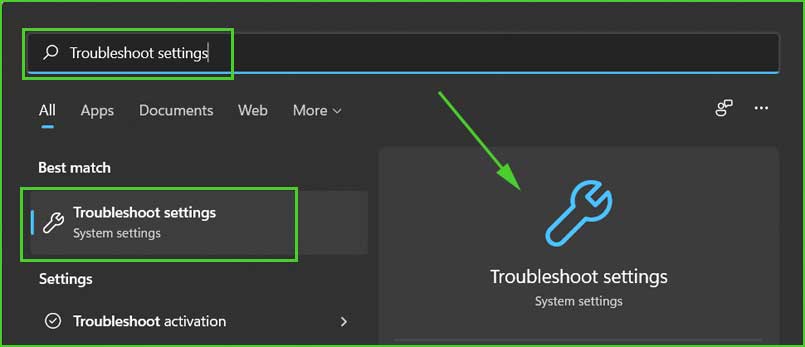
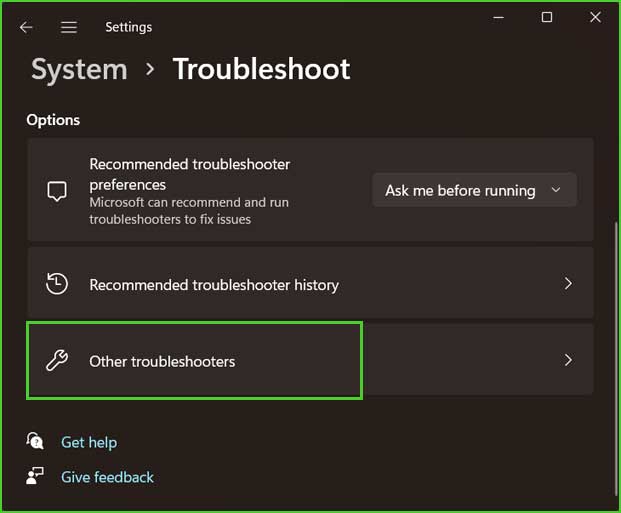
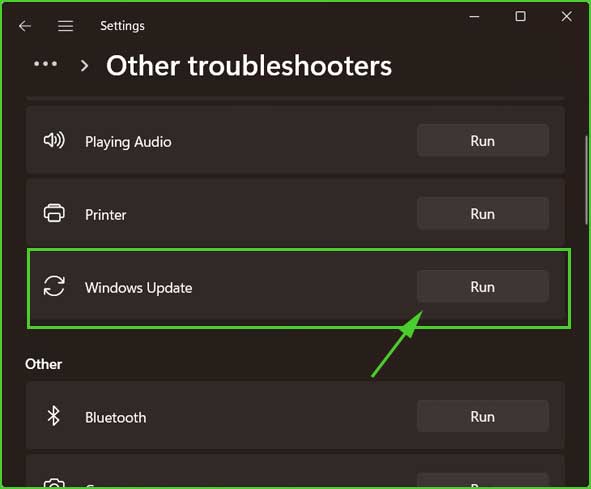
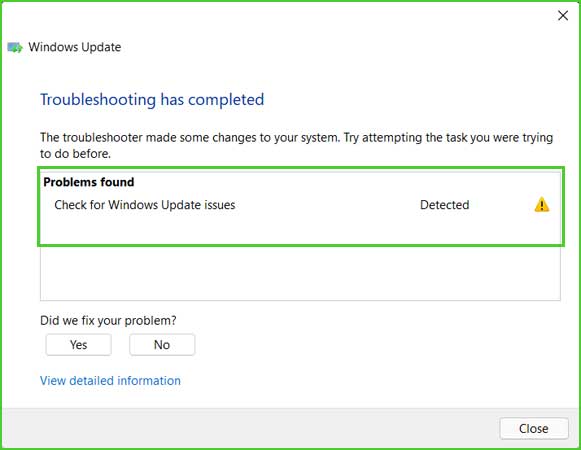
Allow the troubleshooter to scan for issues and apply the recommended fixes. Once the troubleshooter completes its process, restart your computer, and try updating Windows again.
Summary
It is necessary to resolve windows update error 0x80244022, to install newly launched Windows update files.
To fix windows update error 0x80244022, verify date & time settings, turn off proxy and vpn settings, correct poor internet connection, restart windows update service, reset windows update components etc.