The SYSTEM_THREAD_EXCEPTION_NOT_HANDLED error, often abbreviated as a BSOD (Blue Screen of Death), occurs when the system thread encounters an exception that the error handler can’t manage. This error disrupts the typical Windows 11/10 boot process, leading to the appearance of an error message on a blue screen.
Several factors can trigger this issue, including conflicts between software, incomplete update installations, corruption within system files, virus or malware infections, hardware glitches, and registry errors.
While there isn’t a one-size-fits-all solution for resolving this error, there are several potential fixes that could aid in recovering from it and successfully booting your PC.
No matter if you’re facing the dreaded blue screen of death, startup failures, or boot problems, this tool enables you to boot up your PC and recover your precious data effortlessly. So, be sure to use EaseUS Data Recovery Wizard to safeguard your files before proceeding with any fixes!
Note: Free Version allows you to recover upto 2GB Data.
Solution 1: Remove external peripherals and Restarts
In some cases, the SYSTEM_THREAD_EXCEPTION_NOT_HANDLED error may be triggered by external peripherals such as printers, projectors, dongles, headphones, webcams, portable SSDs, and other devices. To address this, try the following steps:
- Disconnect Unnecessary Peripherals: Begin by unplugging all non-essential external devices from your computer, including printers, projectors, headphones, and any other peripherals.
- Restart Your Computer: After disconnecting the peripherals, perform a simple reboot of your computer.
- Check for Error Resolution: Upon restarting, check if the SYSTEM_THREAD_EXCEPTION_NOT_HANDLED error persists. Removing external devices may resolve the issue.
If the error is no longer present after disconnecting these peripherals, you can try reconnecting them one by one to identify which specific device was causing the problem. This will help you isolate the troublesome hardware.
However, if the error continues to occur even after removing external devices, you should follow further troubleshooting steps to address potential software, driver, or system issues.
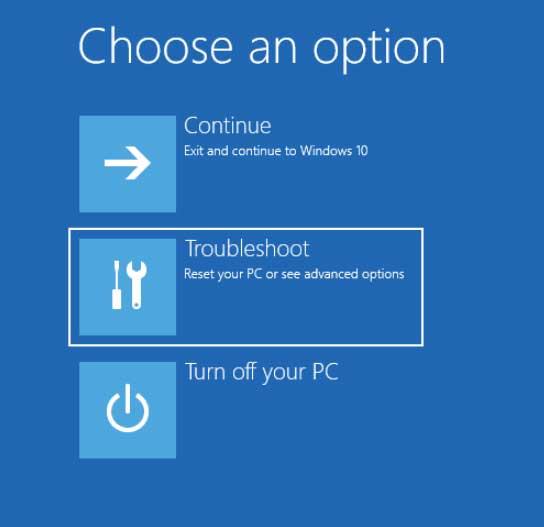
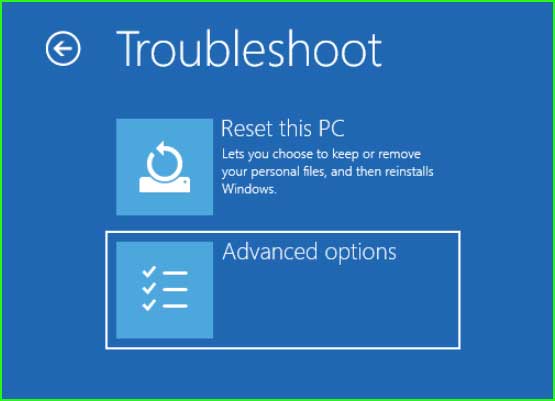
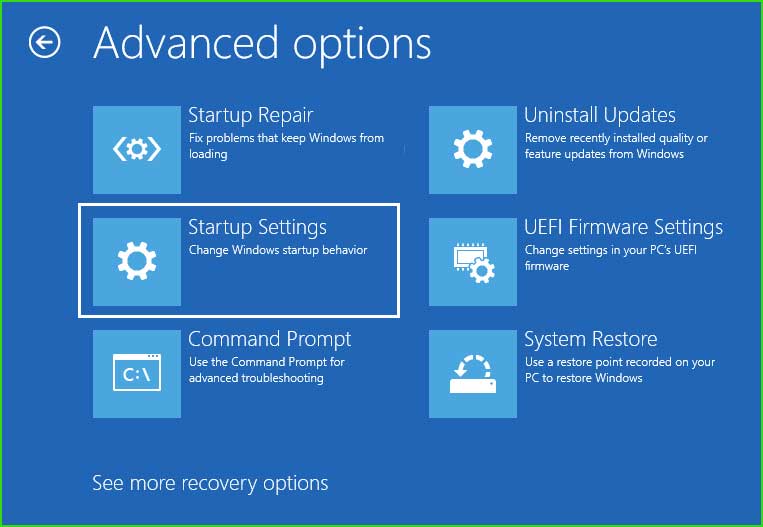
Solution 2: Boot PC in Safe mode
To determine if the SYSTEM_THREAD_EXCEPTION_NOT_HANDLED error is caused by driver corruption or software conflicts, you can boot your PC into Safe Mode. Safe Mode loads a minimal set of drivers and essential services, helping to isolate the issue. Here’s how to do it:
Open PC in Safe Boot Mode
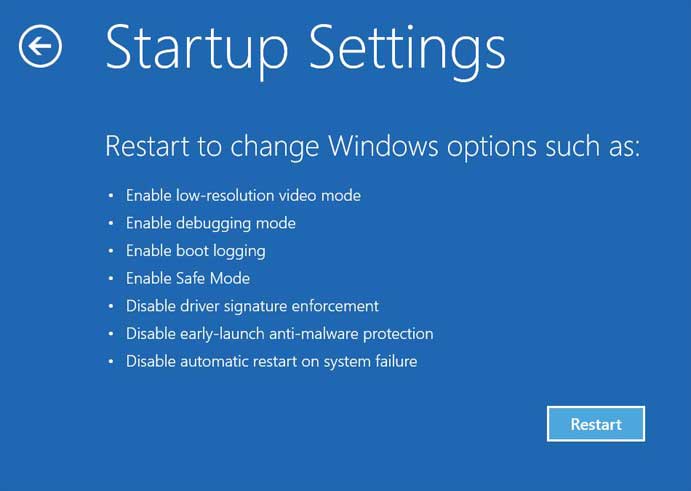
Your computer will now boot into Safe Mode. In Safe Mode, check if the error still occurs. If the error does not appear in Safe Mode, it indicates that a driver or software conflict is likely causing the problem.
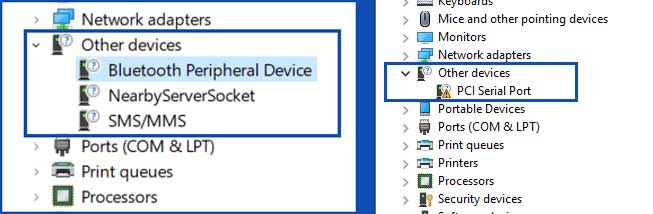
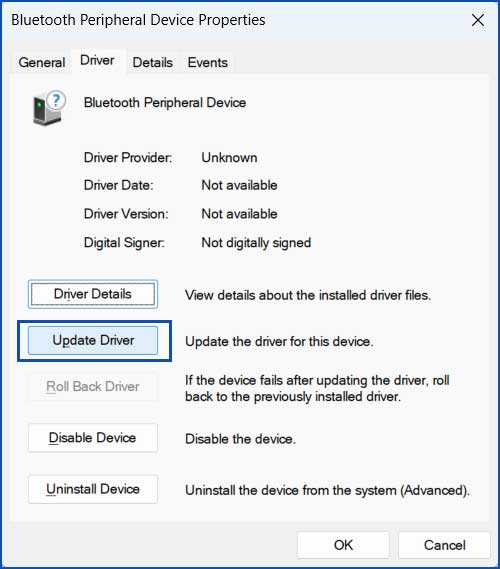
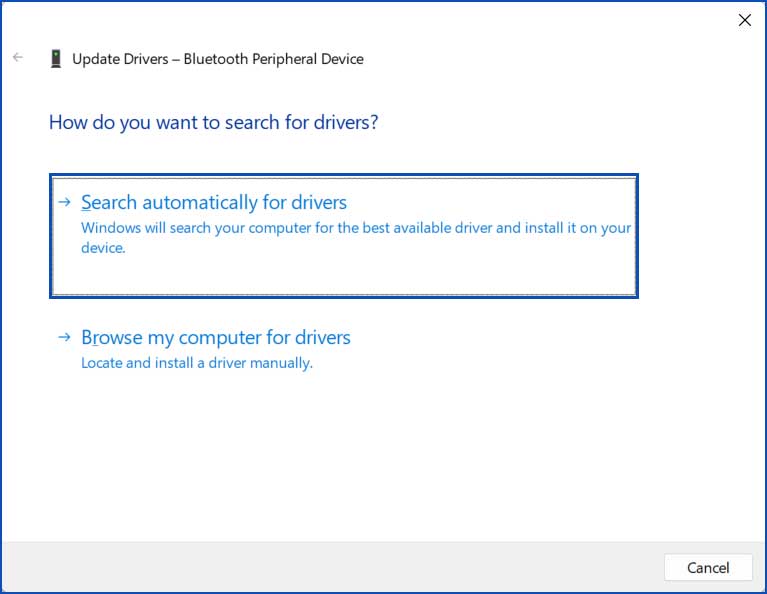
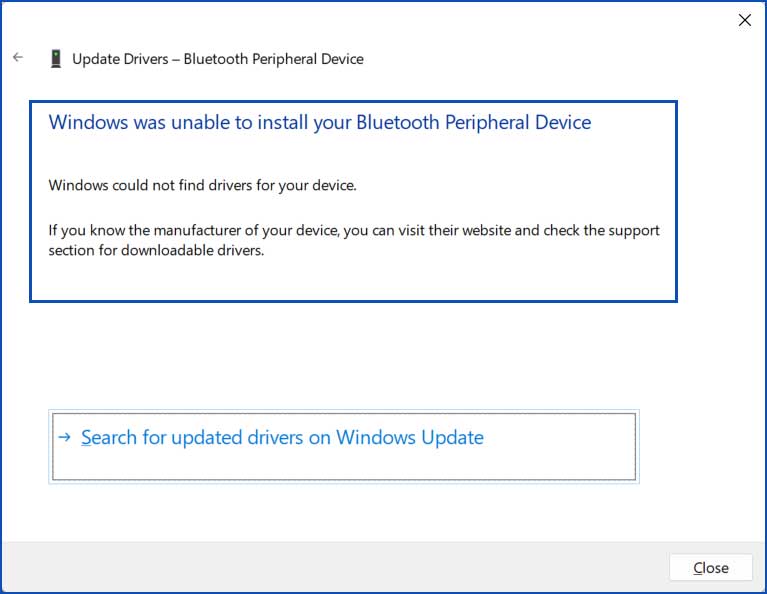
1. Update Driver
Update Driver - Step by Step
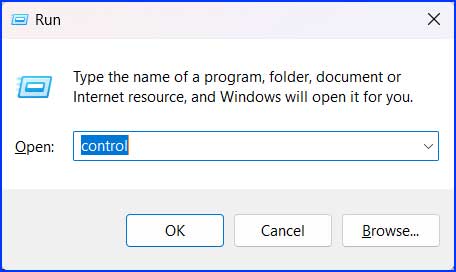
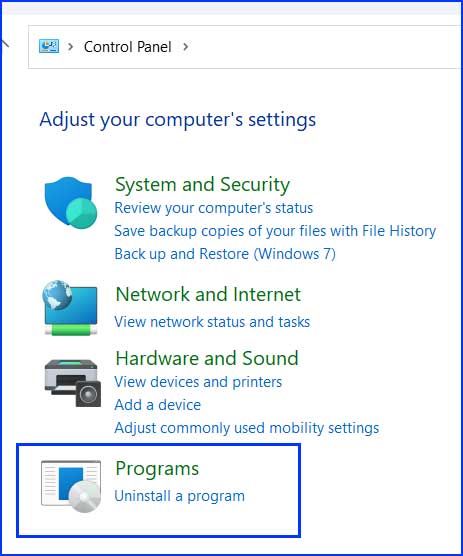
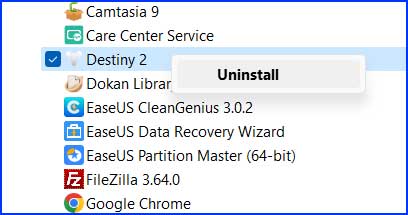
2. Uninstall recently added software.
Uninstall Program
Step 1: Open Control Panel. Type “Control” in the Run Dialog box and press Enter.
Step 2: Click on the “Uninstall Program” under the “Programs” section.
Step 3: Right-click on the unused or infrequent apps and select Uninstall.
Solution 3: Run the Memory Diagnostic Tool to check RAM problems.
Indeed, MDSCHED.exe is the Windows Memory Diagnostic Tool, which is used to diagnose and find errors in your computer’s RAM (Random Access Memory). Testing your RAM for errors can be helpful if you’re experiencing system instability, crashes, or other issues that might be related to faulty memory. Here’s how to use the Windows Memory Diagnostic Tool:
Run Memory Diagnostic Tool
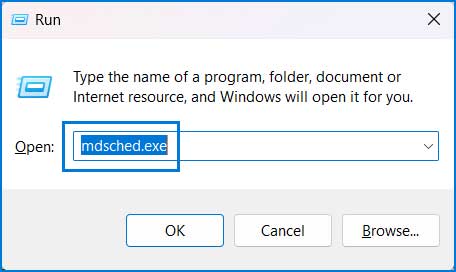
Step 1: Open the Run dialog box by pressing the Windows key + R. Type mdsched.exe and press Enter.
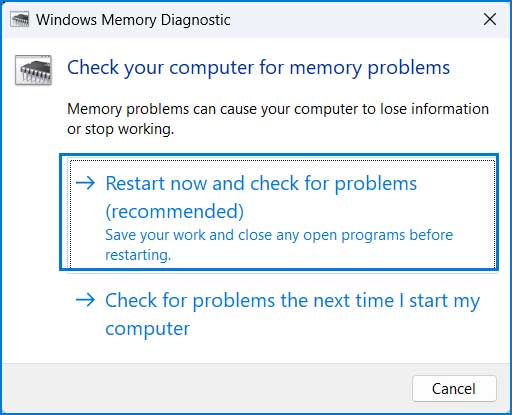
Step 2: Click on “Restart now and check for problems (recommended)“.
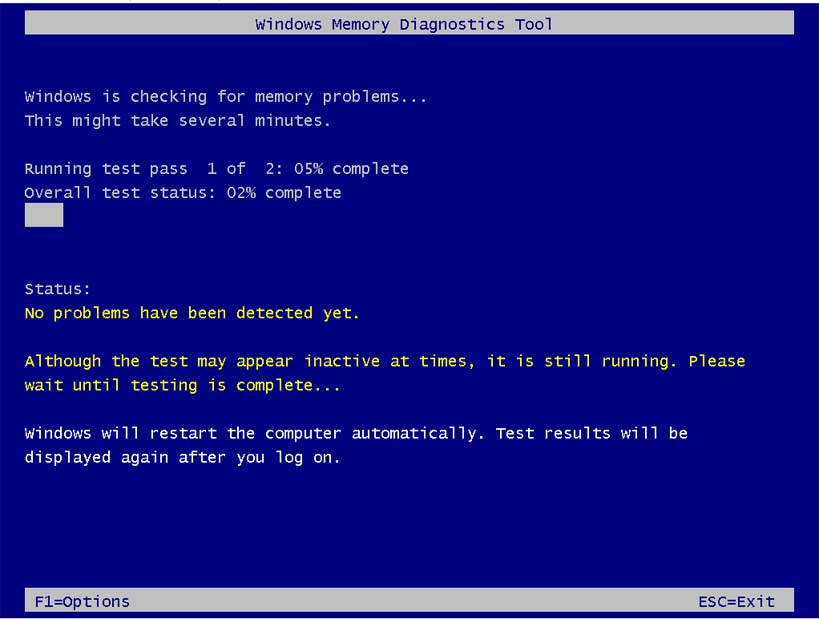
Step 3: The memory testing process will start on reboot.
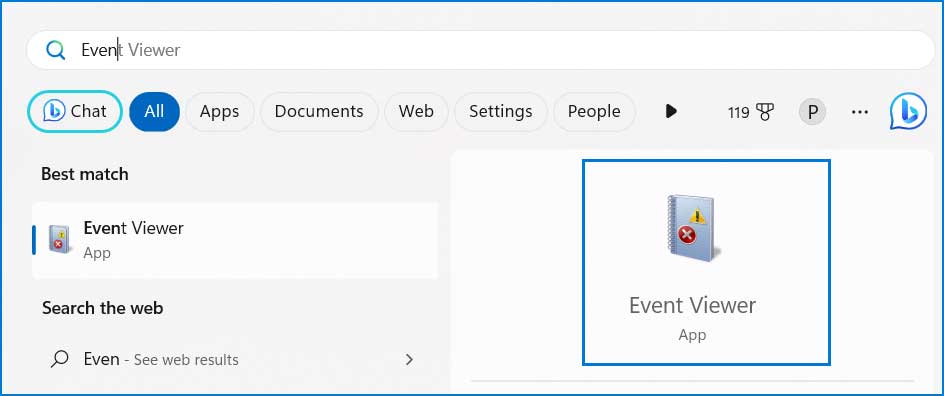
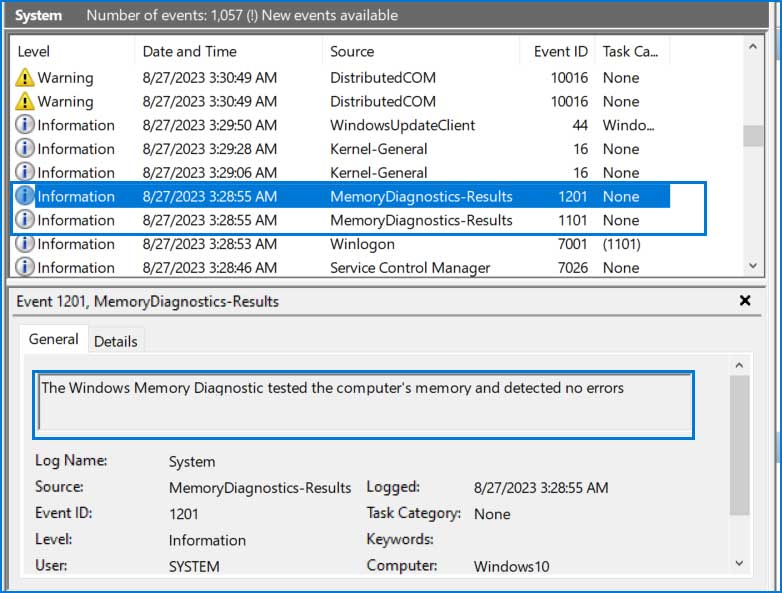
Step 4: The scan result will be displayed after login your computer. If it does not display the scan results, you can see the result in the Event Viewer app.
1. Click on the Start menu. Search for Event Viewer and open it.
2. Expand Windows Logs → System.
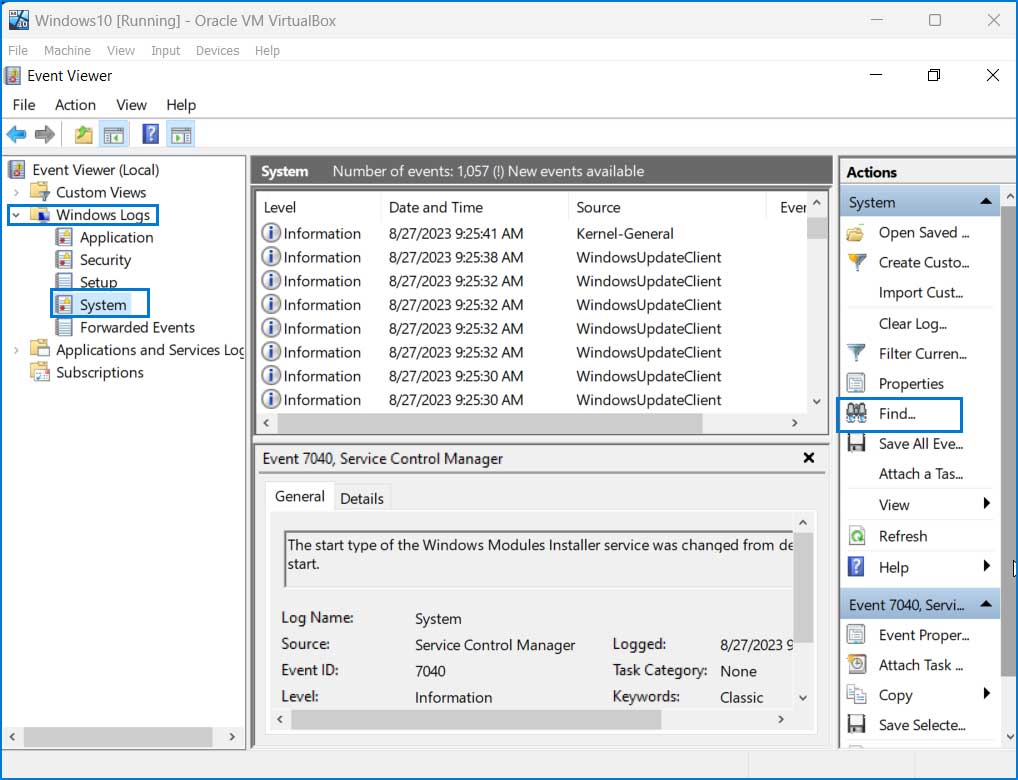
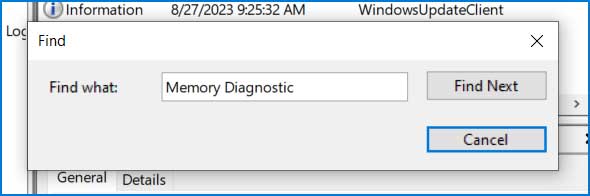
3. Click on the Find button and search for Memory Diagnostic.
4. You will see the Memory Diagnostic results.
Solution 4: Run the System Repair command
In Windows troubleshooting, you’ll find essential commands like chkdsk, sfc, dism, and fixboot. These tools are invaluable for detecting and repairing a range of system issues, such as corrupted system files, disk bad sectors, and damaged Windows images. To effectively address Windows problems, it’s advisable to execute these system repair commands within Windows Recovery Mode, where issues are meticulously diagnosed and resolved.
SFC/Chkdsk/Dism - Step by Step
sfc /scannow
Dism /Online /Cleanup-Image /CheckHealth

Dism /Online /Cleanup-Image /ScanHealth

Dism /Online /Cleanup-Image /RestoreHealth
chkdsk /f c:
It will show you message:
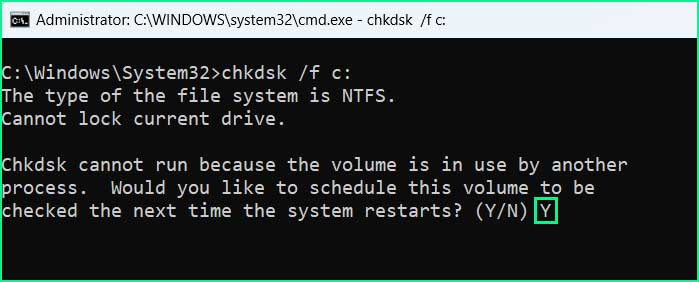
Chkdsk cannot run because the volume is in use by another process. Would you like to schedule this volume to be checked the next time the system restarts? (Y/N)
Press Y and Press Enter. The disk checking will start on next pc start.
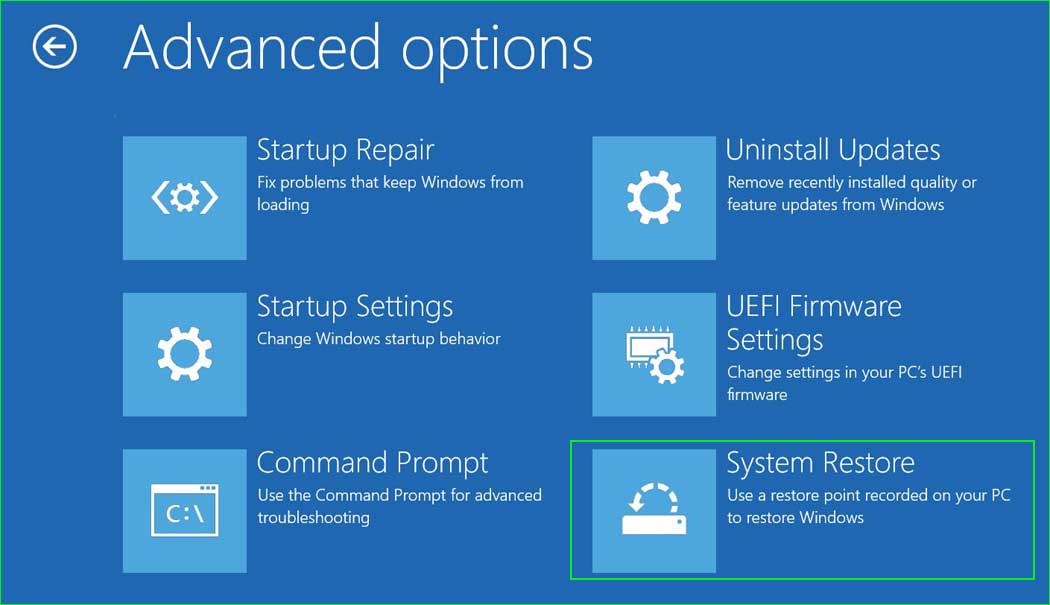
Solution 5: Perform System Restore
System Restore can indeed be a lifesaver when dealing with critical BSOD errors like SYSTEM_THREAD_EXCEPTION_NOT_HANDLED. If you have a system restore point created prior to the occurrence of the error, you have the opportunity to roll back your system to a previous state, effectively undoing recent changes and potentially resolving the issue, allowing your PC to boot successfully once more.
System Restore - Steps by Steps

Solution 6: Clean Windows Installation
If none of the above methods work, it is advisable to back up all your data using EaseUS Data Recovery Wizard and then proceed with a clean Windows installation. To perform this action, you will need a bootable Windows USB drive.
Recover 1000+ File Types
Repair Photos, Videos, and Documents
Camera Recovery
HDD/SSD/NAS/USB/Memory Card Recovery
Crashed Windows Recovery
Excellent 99.7% Recovery rate
Summary:
The SYSTEM_THREAD_EXCEPTION_NOT_HANDLED error can be incredibly frustrating as it hinders Windows from loading correctly. This BSOD error occurs when the system encounters a critical fault in its software, drivers, or hardware. Fortunately, this article provides several valuable solutions to help you recover from this error.