Imagine starting your computer one day, only to be greeted with a distressing message: “Reboot and Select Proper Boot Device.” For most people, this mysterious error can cause panic and frustration. However, fear not, as we’re here to guide you through the process of troubleshooting and resolving this issue on your Windows 10 computer.
Understanding the Error
The error message, “Reboot and Select Proper Boot Device” or “Insert boot media in selected boot device” typically appear when your computer fails to locate a bootable device. It means that the system cannot find the operating system or any bootable storage media to load the Windows 10 operating system.
Causes of the Insert boot media in selected boot device error?
Several factors can lead to this error and understanding them can make troubleshooting easier. Here are some common causes:
- Incorrect Boot Order: The BIOS or UEFI firmware, responsible for managing hardware and boot processes, may have an incorrect boot order, causing the system to attempt to boot from an unavailable device.
- Corrupt or Unplugged Storage Device: A corrupt or malfunctioning hard drive, SSD, or removable storage device might lead to the error message.
- Faulty Data or Power Cables: In some cases, loose or damaged data and power cables can prevent the system from recognizing the boot device.
- BIOS/UEFI Settings: Incorrect settings within the BIOS or UEFI firmware can interfere with the boot process.
- Outdated BIOS/UEFI: An outdated firmware version might not be compatible with the hardware or Windows 10.
- Malware or Viruses: Malicious software can disrupt the boot process and lead to boot device errors.
- Hardware Failure: Rarely, hardware components, such as the motherboard or hard drive, might fail, resulting in boot issues.
How to Fix Reboot and Select Proper Boot Device error on Windows 10 & 11
Now that we know the possible causes, let’s delve into the troubleshooting steps to fix the “Reboot and Select Proper Boot Device” error in Windows 10.
No matter if you’re facing the dreaded blue screen of death, startup failures, or boot problems, this tool enables you to boot up your PC and recover your precious data effortlessly. So, be sure to use EaseUS Data Recovery Wizard to safeguard your files before proceeding with any fixes!
Note: Free Version allows you to recover upto 2GB Data.
Solution 1: Check Bootable Media
Ensure that no CD/DVD, USB flash drive, or external hard drive is connected to your computer. Sometimes, these devices can interrupt the boot sequence.
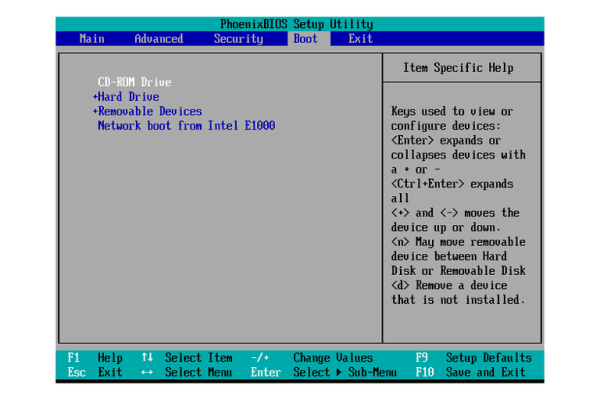
Solution 2: Verify Boot Order
Verify Boot order in BIOS - Step by Step
Solution 3: Check Cables and Connections
Ensure that all data and power cables connecting your storage devices to the motherboard are securely plugged in. A loose connection can prevent the system from detecting the bootable drive.
Solution 4: Set the primary partition to active.
Your primary partition may become inactive due to issues like improper power outages, disk read/write errors, or virus infections. To resolve these problems, you need to set the partition as active. Follow these steps to make a partition active:
Set a Partition as Active using Diskpart
diskpart

list disk

select disk 0
list partition

select partition 1

active
After following these steps, the specified partition should be set as active. Be cautious and ensure you have chosen the correct partition, as setting the wrong partition as active could cause boot problems for your system.
It is highly advisable to utilize a professional partition manager for risk-free disk partition management. EaseUS Partition Master simplifies various disk management tasks, including fixing boot issues, rebuilding MBR, managing partitions, converting MBR/GPT/NTFS/FAT32, cloning OS, and creating bootable flash drives for Windows 11/10/8/7.
Resize/Extend Partition
Clone/Migrate HDD/SSD
Convert between GPT/MBR/NTFS/FAT32
All-in-One Disk Management System
Safe & Secure 65 Million Users
99.7% Success Rate
Excellent Trustpilot Rating
TrustScore:4.7 Review:14.5K
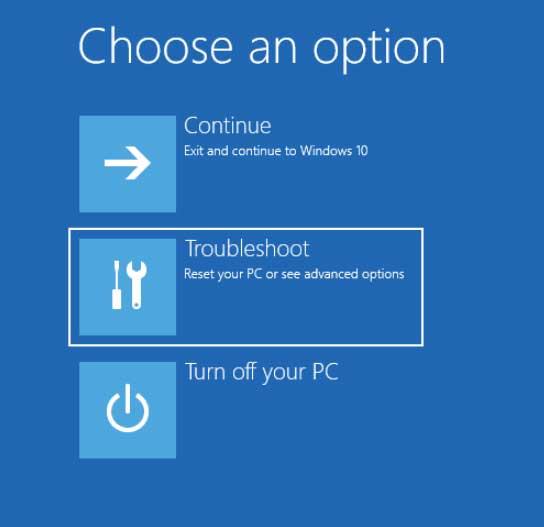
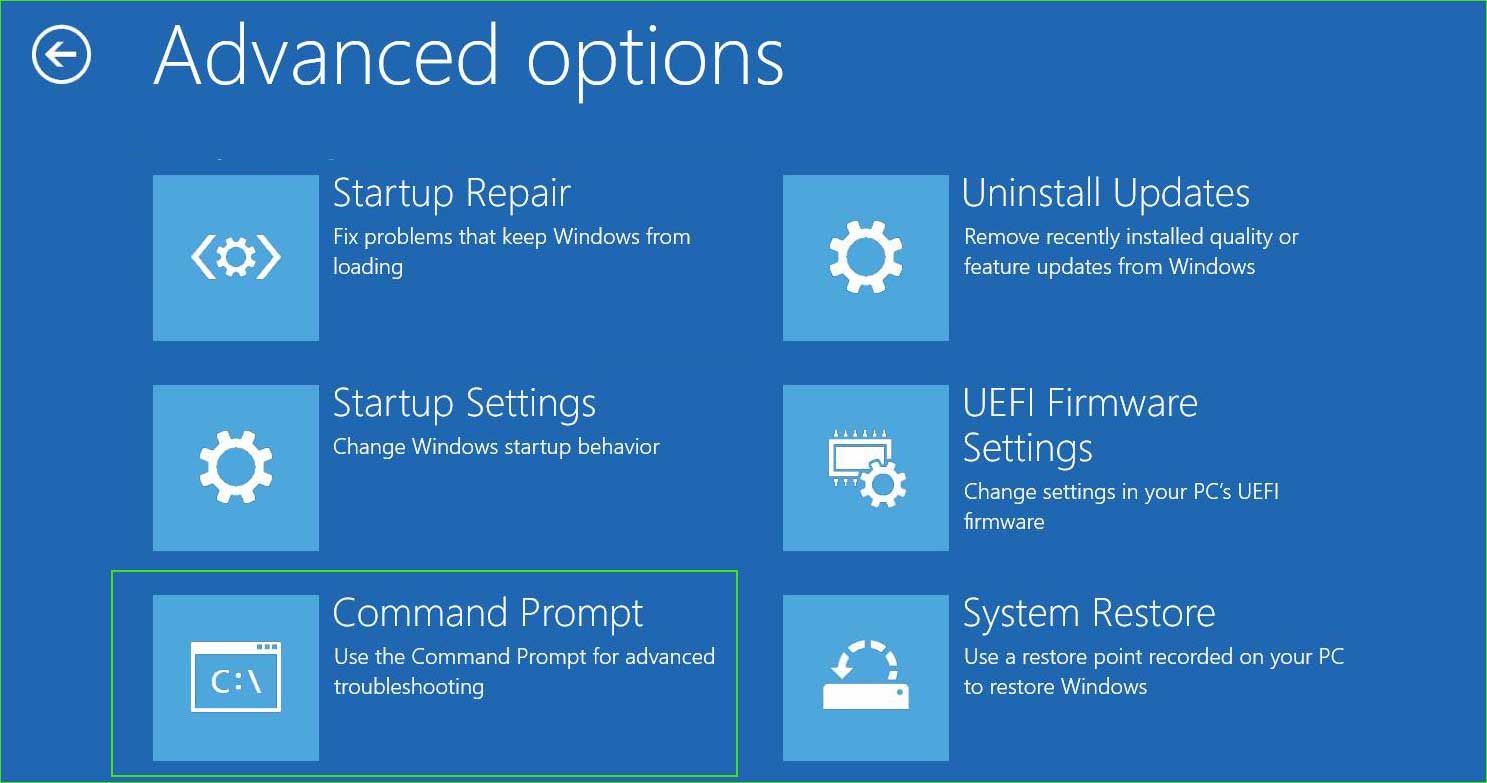
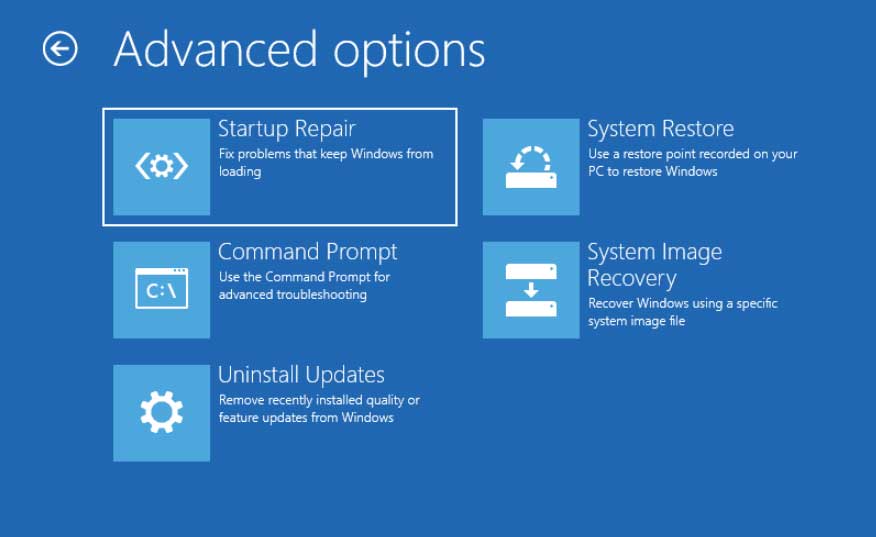
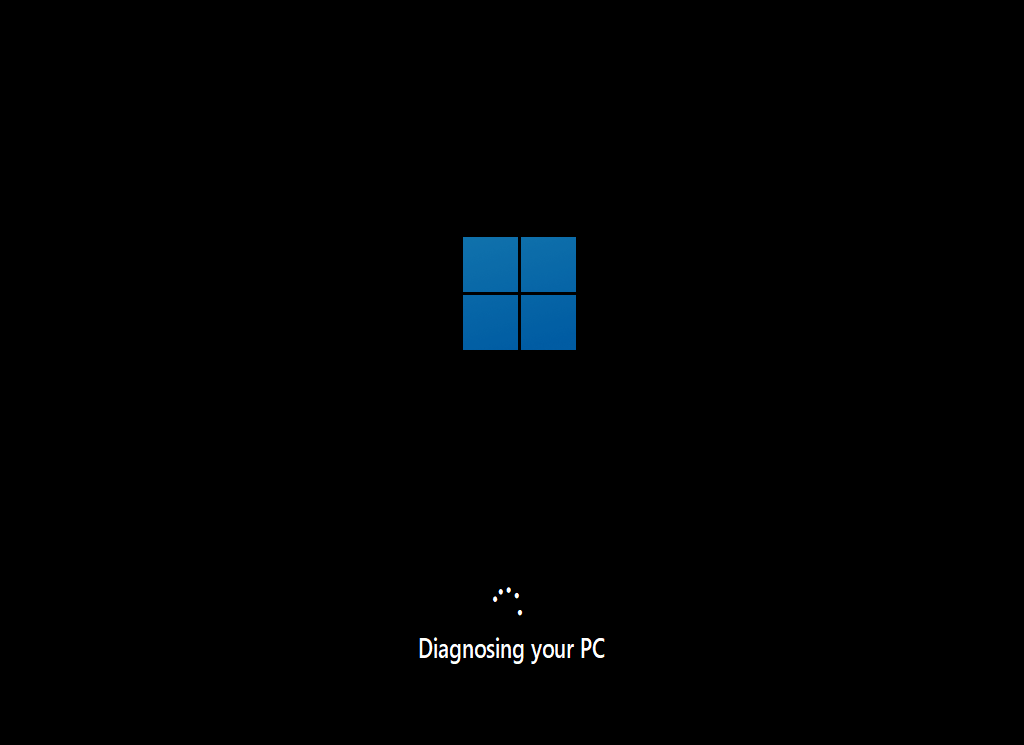
Solution 5: Run Windows Startup Repair
Startup Repair is a feature available in Windows operating systems, designed to diagnose and fix certain issues that prevent the computer from booting properly.
Startup Repair - Step by Step

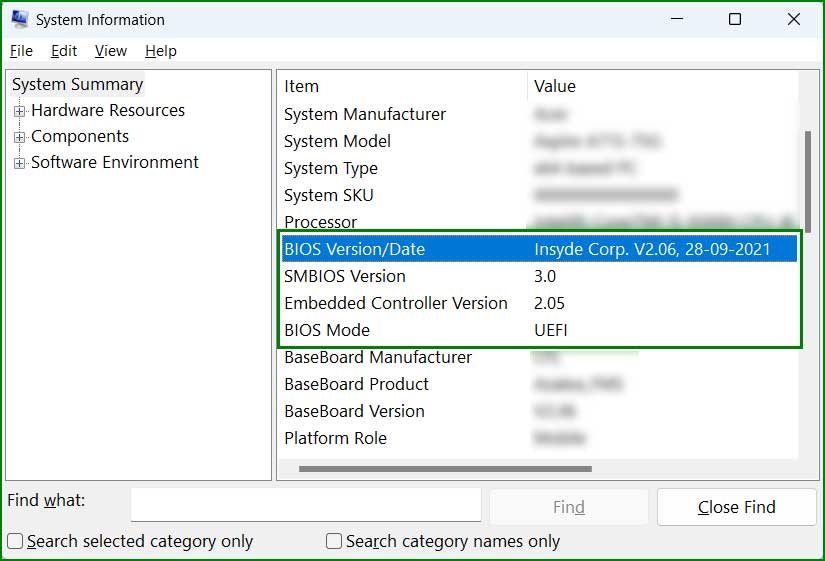
Solution 6: Update BIOS/UEFI Firmware
Visit your computer manufacturer’s website and check for the latest BIOS/UEFI firmware updates. If available, follow their instructions to update the firmware.
Updating BIOS
Solution 7: Scan for Malware
Perform a thorough scan for malware using a reputable antivirus program to ensure that viruses or malicious software are not causing the boot issue.
Conclusion
Encountering the “Reboot and Select Proper Boot Device” error on your Windows 10 computer can be threatening, but armed with the right knowledge, you can troubleshoot and fix the issue. By checking boot order, verifying cables, and updating firmware, you’ll increase your chances of getting your system up and running smoothly again. If the problem persists, don’t hesitate to seek professional help to diagnose and resolve any hardware-related issues. Remember, patience and persistence will lead you to a successful resolution. Happy computing!